- Published on
Transform your old laptop into a Single Node OpenShift lab
- Authors

- Name
- Christophe Schmitz
TL;DR
Anyone using OpenShift regularly would want to have their own small cluster at some points. There are multiple ways to achieve that, one popular approach is to run OpenShift Local, which is effectively a minimalistic Single Node OpenShift running in a VM, on your laptop. I ran OpenShift Local for a while, but found several limitations I wanted to overcome. Another simple way would be to run your own managed OpenShift ROSA or ARO cluster in AWS / Azure, probably fine if funded by work, but a bit too pricey for a personal lab setup.
The option I settled for at the moment is to recycle an old laptop and turn it into a Single Node OpenShift (SNO). There are several articles / blogs that deal with this kind of lab setup. To my knowledge, none of them manage to deal easily with the question of storage. This one does hopefuly. So read it, especially the bit about disk partitioning.
Table of Contents
Find the hardware.
A spare laptop with a NIC (usb-c to ethernet is fine), 8vCPU, and 16GB of RAM is enough to get started, though 16vCPU / 32GB will be more comfortable. You also need some disk. You probably want 512GB of Disk as a minimum, but you can make it work with say 200GB. In most cases, a laptop would have just one disk. By default, the OpenShift Assisted Installer which we will use, consume the whole disk, and you have no storage left for your OpenShift cluster itself. There are a couple of ways to try and fix that, we will review them later.

In my case, I have an old Lenovo W540 from 2015, it has 8vCPU and 32GB with 512GB SSD disk. That’s perfect for a lab SNO. Make sure you take note of your laptop MAC address (or your usb-c to ethernet adaptor MAC address), you will need it at some point. For that, I use the linux command ifconfig.
Create an account on redhat.com
Head to https://console.redhat.com/openshift If you have an account, just login, otherwise, create a new one.
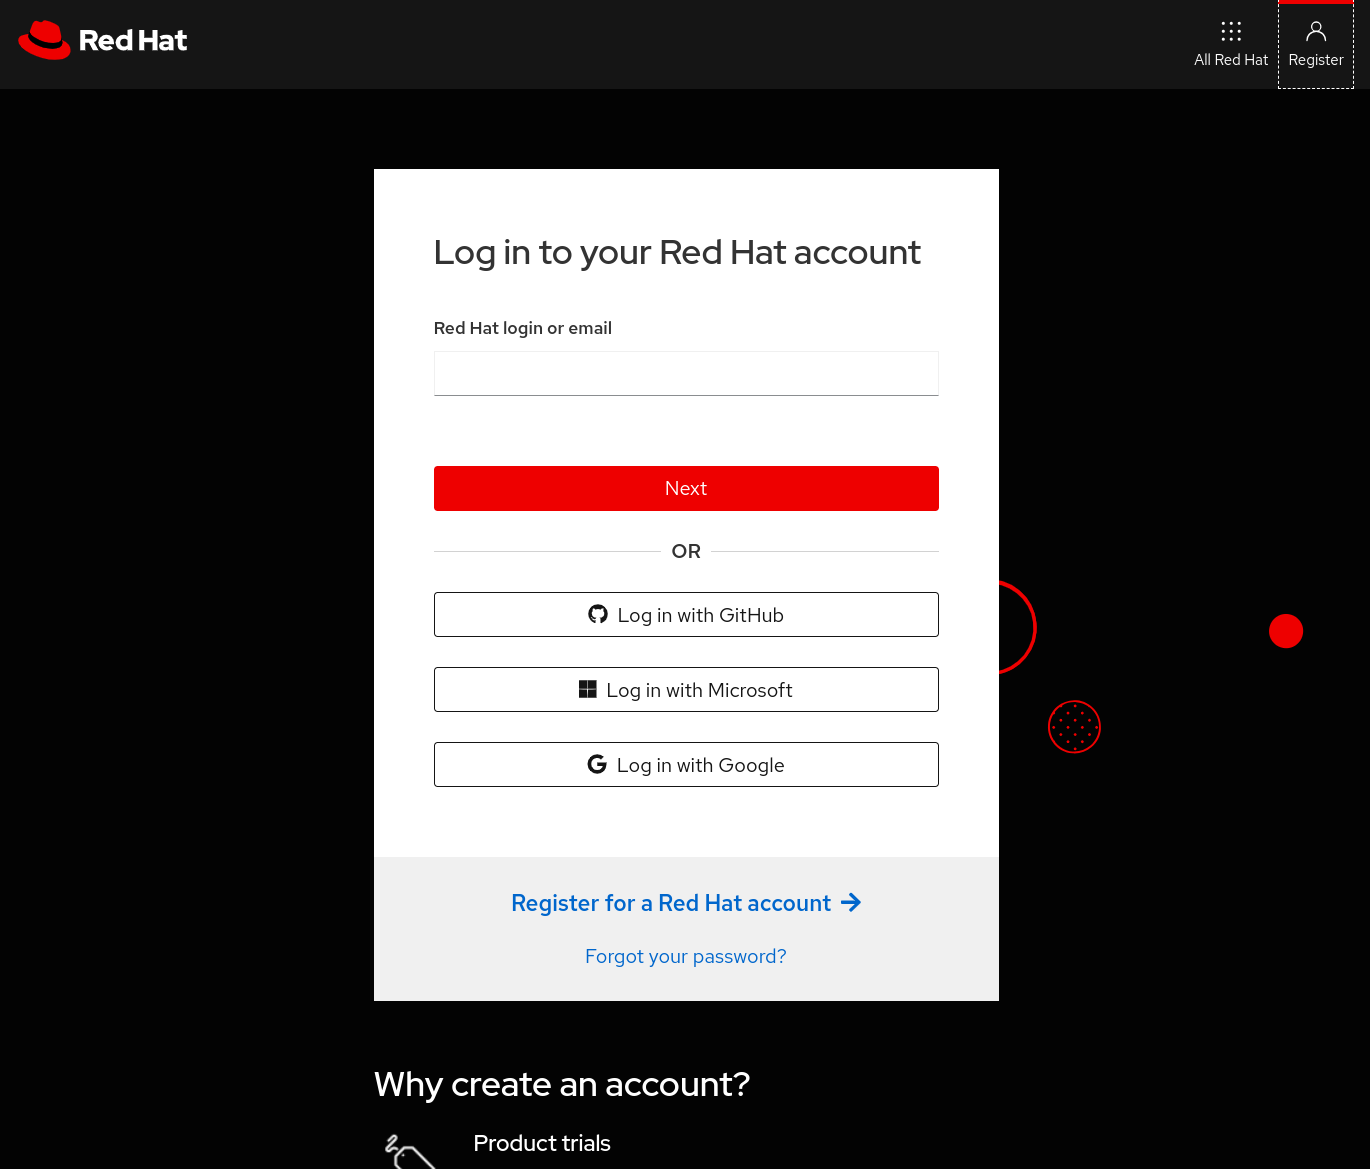
You will have to enter some info, I know it’s a bit annoying, but it’s worth it.
Create the cluster via the Assisted Installer
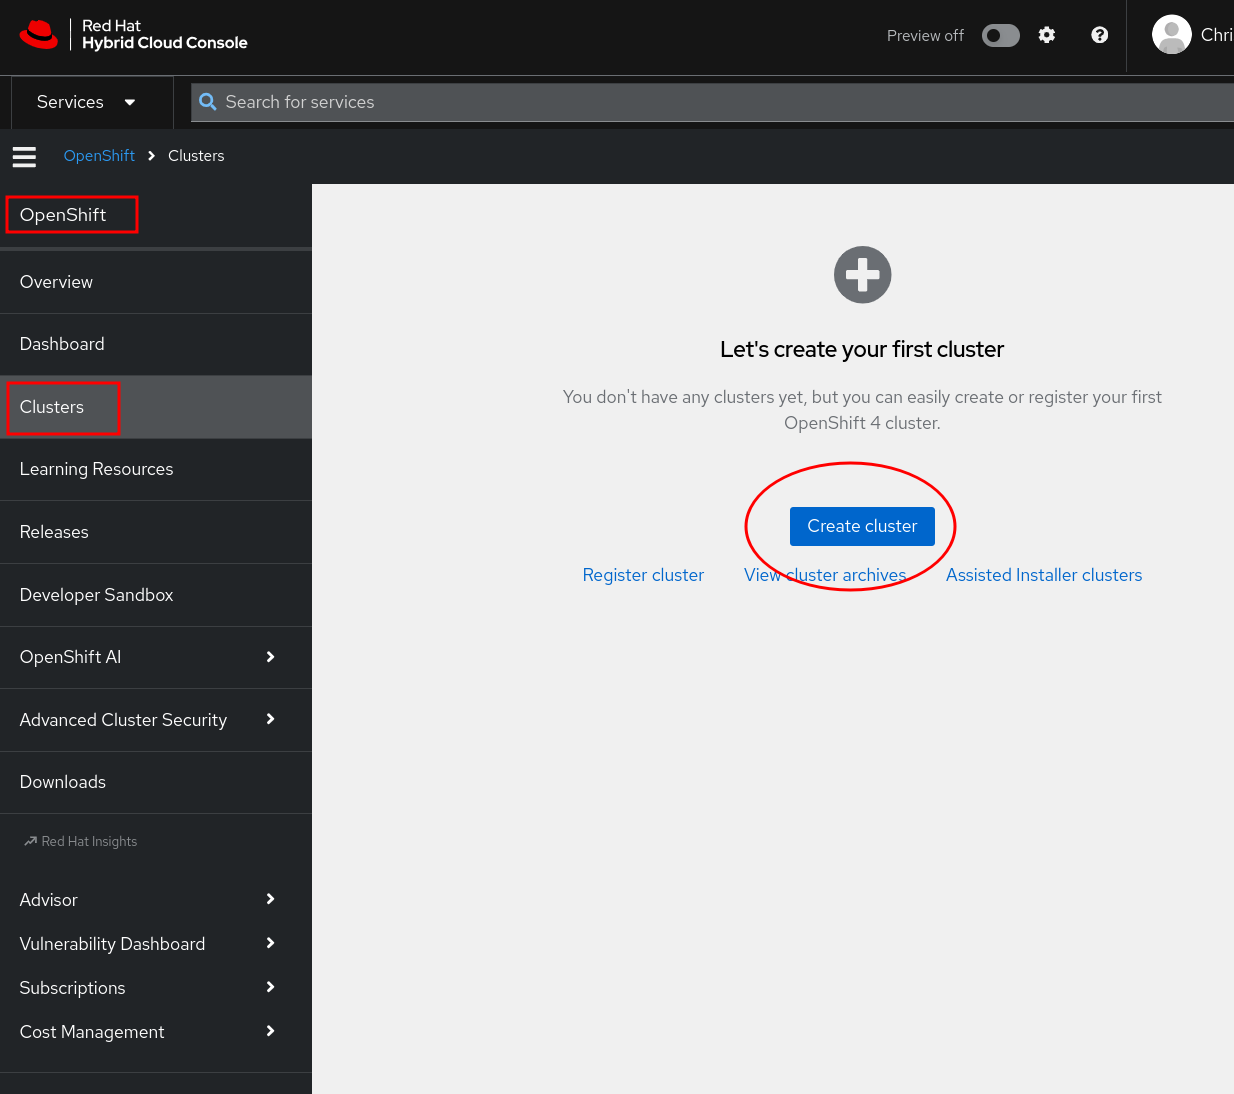
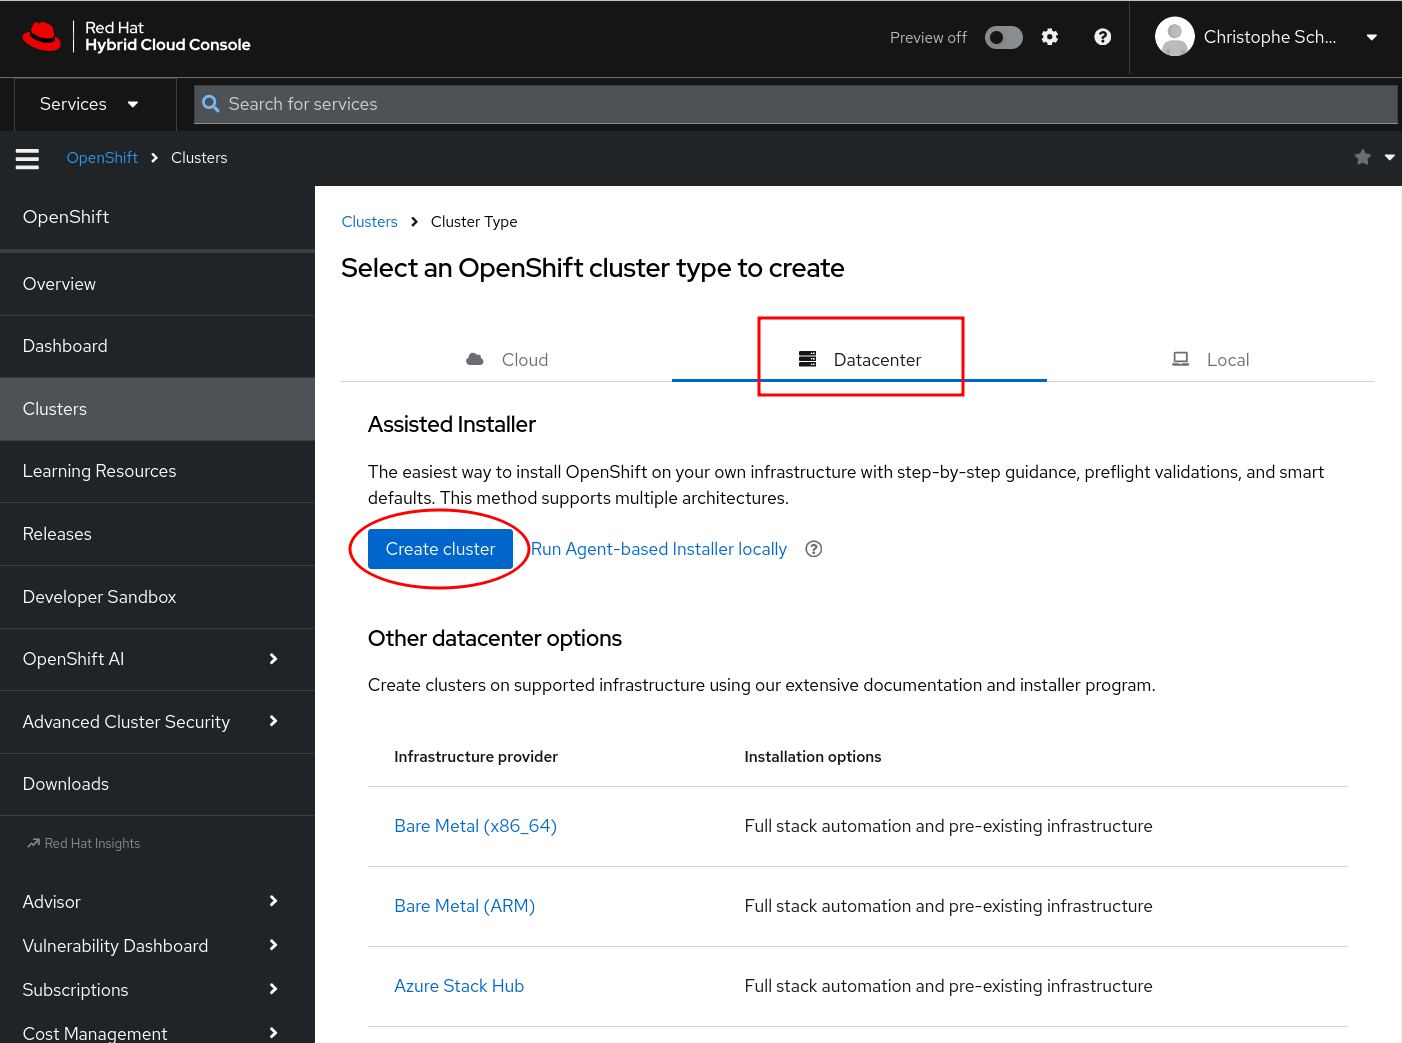
Once done, you should be able to reach The hybrid cloud console. From there, you can click on create cluster. There are many ways to create / install a cluster, we are going to use the Datacenter tab, with the Assisted Installer. Assisted Installer is so simple, even I can do it.
Cluster details
In the first “cluster details” form,
you give your cluster a name, for example
lab.You give it a domain name. I happen to own
cszevaco.com, and can manage DNS via cloudflare. This makes my life easier. Alternatively, you can use any domain as long as you can install / manage / configure some local DNS. My cluster will be under lab.cszevaco.com, and I will manage a couple of DNS entries via cloudflare.Make sure to check
SNOfor Single Node OpenShift. Otherwise, you will need at least 3 nodes.Make sure to check
Include custom manifestsThis will let you add custom kubernetes resource, in particular, MachineConfig resrouces. This is particularly relevant if you only have one disk, and want to configure MachineConfig to get the partitioning done for you:- one partition for the OpenShift node install and system (Red Hat CoreOS),
- the other partition to be used by OpenShift for a lvms storage class. You need a storage class to provision Persistent Volume / Persistent Volume Claim. Without that, your kubernetes workload won’t have any persistence, and you will be seriously limited.
For the network configuration, the simplest is to use DHCP, but I have to use
Static IP, bridges and bondsYou will want your SNO to always be allocated the same IP address (upon reboot), and you can typically do that via your router/modem by configuring it to allocate a given IP address (say 192.168.1.128) for a given mac address (the one of your laptop NIC). In my case, sadly, the router I am using doesn’t let me do that, and I didn’t want to have to configure my own DHCP. So instead, I am configuring my SNO with static IP.

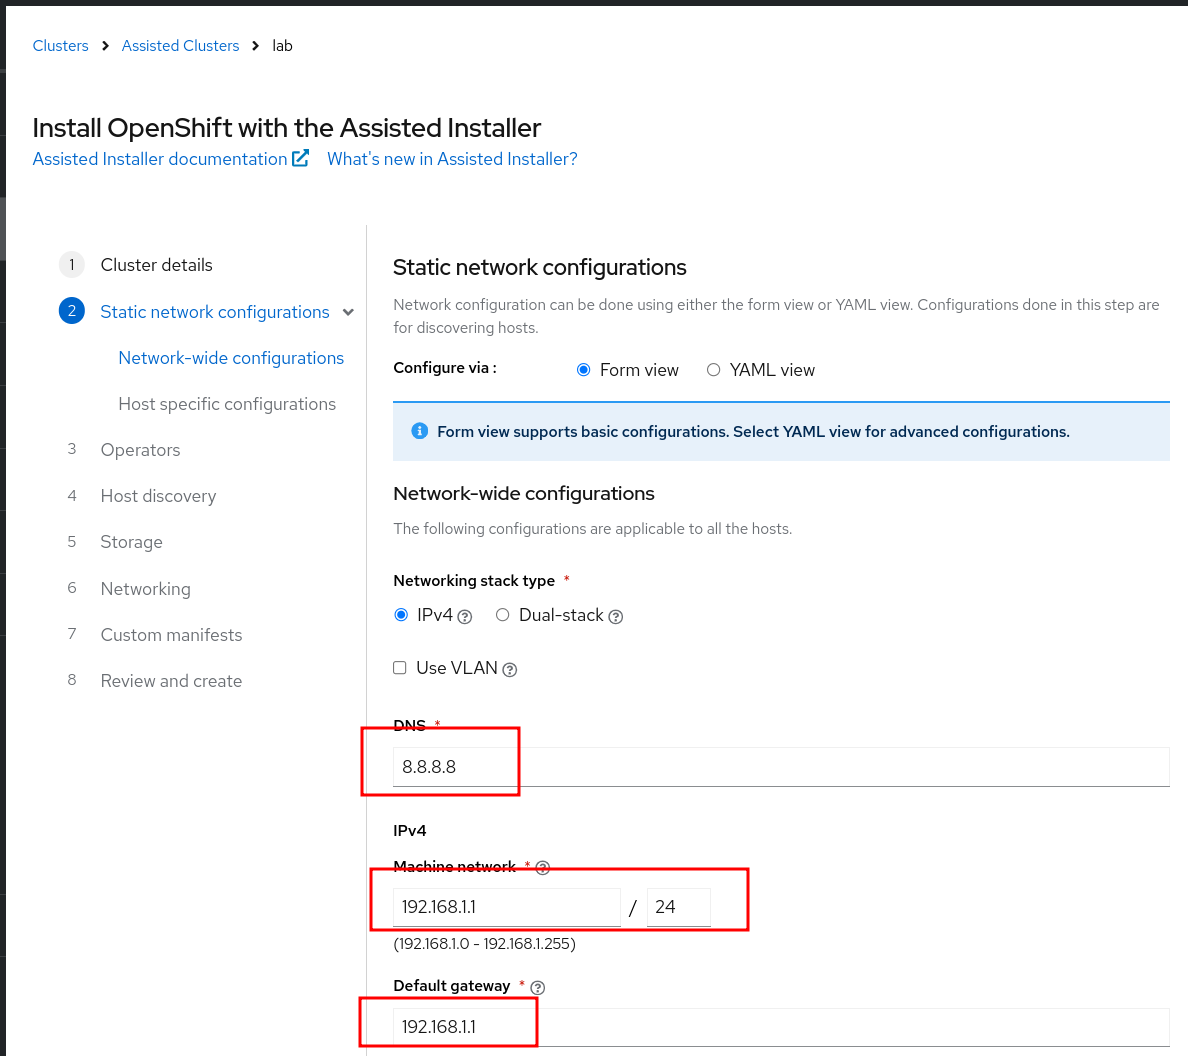
Static Network Configuration - Network Wide configuration
Since I picked Static IP, bridges and bonds earlier, I will have to configure some details. You won't if you stick with DHCP.
- For the
DNS, I typically use8.8.8.8. That's because I like google to know what I am doing, and I hope they poke me on Linkedin for a job. You can also use a few other public one, or most likely, the one of your router, which for a home router is usually 192.168.1.1 - Speaking of which, for the
Machine Network, just use the network of your router, which typically is192.168.1.1/24. If you are currently connected to your network,ifconfigshould return some info that help you understand your network. - For the
Default gateway, again, on a home router, it is often192.168.1.1. The linux commandroute -nis useful otherwise.
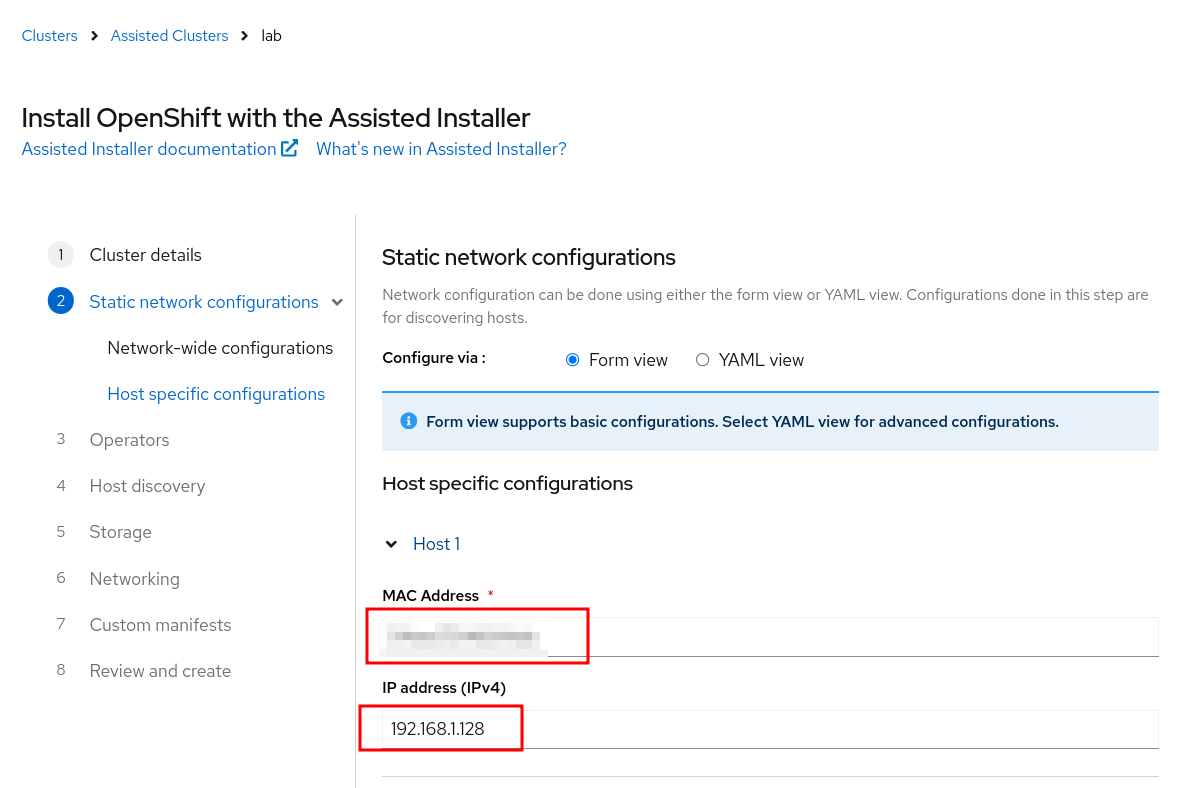
Static Network Configuration - Host Specific configuration
Here, for each nodes (but for a SNO just one node obviously), we can provide the maping between the NIC mac address, and the desired IP for the node. In this case, I am going to assign 192.168.1.128 to my SNO
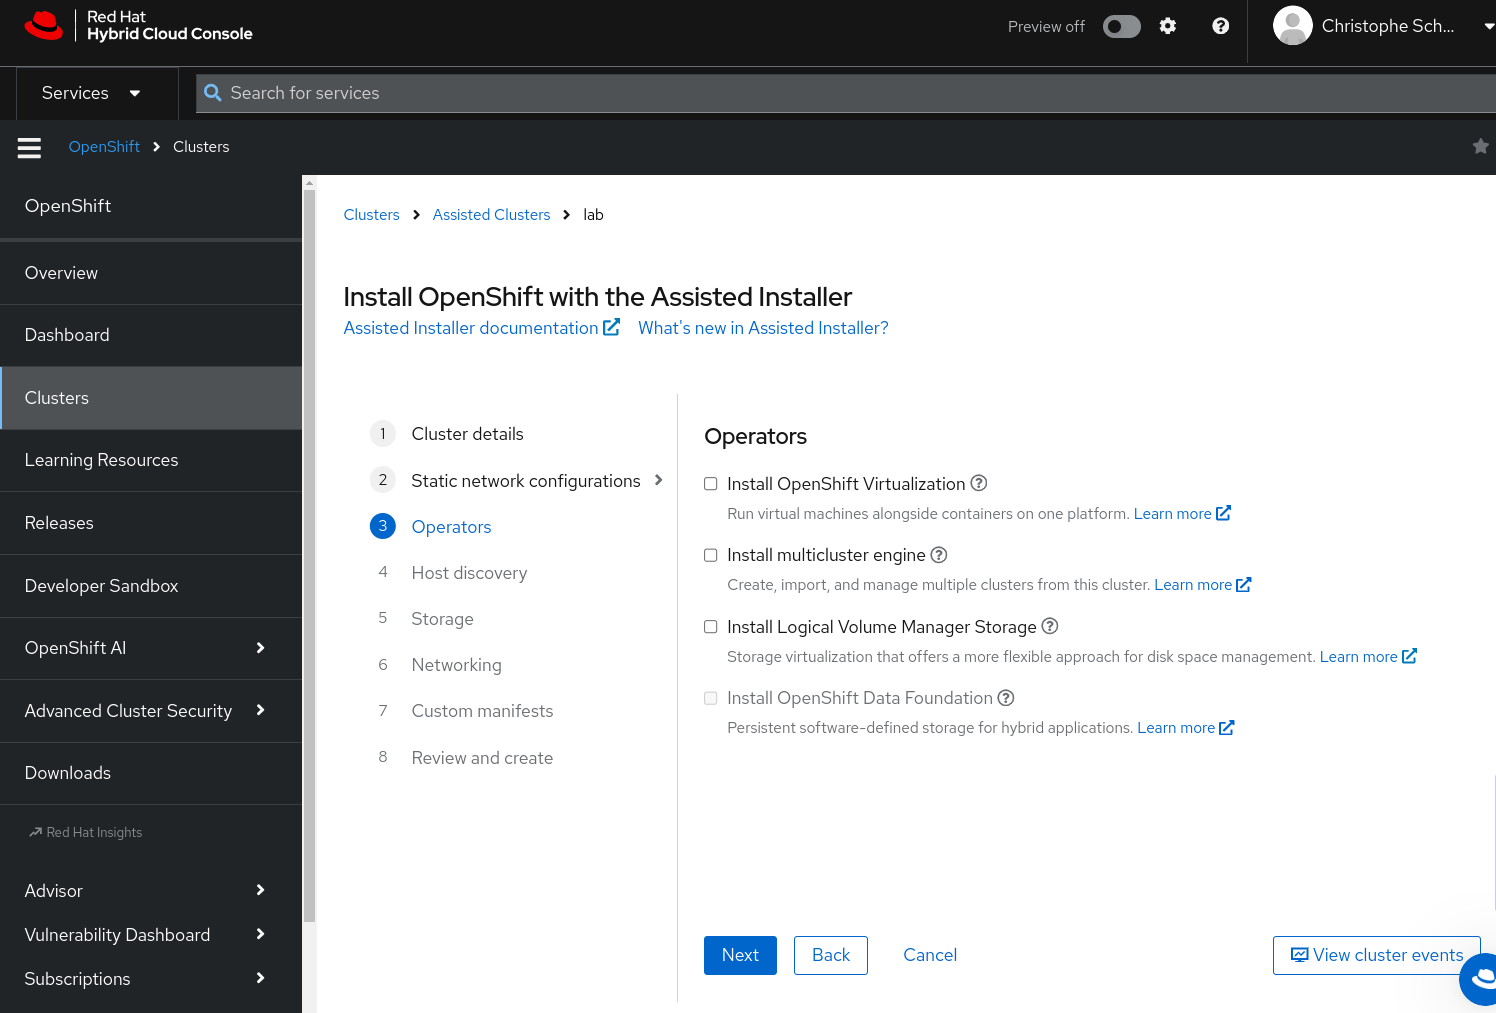
Operators
There is a short list of Operators that can be deployed automatically via the Assisted Installer. Operators extend your cluster capacity in various way, a bit like your apple or android store let you add apps to your phone. Among the hundreds of operators available, currently 4 can be pre-installed through the Assited Installer. Each of them will increase the "minimum requirements" for your cluster. For example, if I pick now the LVMS (Logical Volume Manager Storage) which I know I need, I would need my hardware to have one extra vCPU, which I don't have. The Assisted Installer will not let me progress when it discovers that my hardware is not enough for 8 + 1 vCPU. So I am not ticking it now, but I will install the Operator later anyway when my cluster is running. It will run perfectly fine for a lab environment.
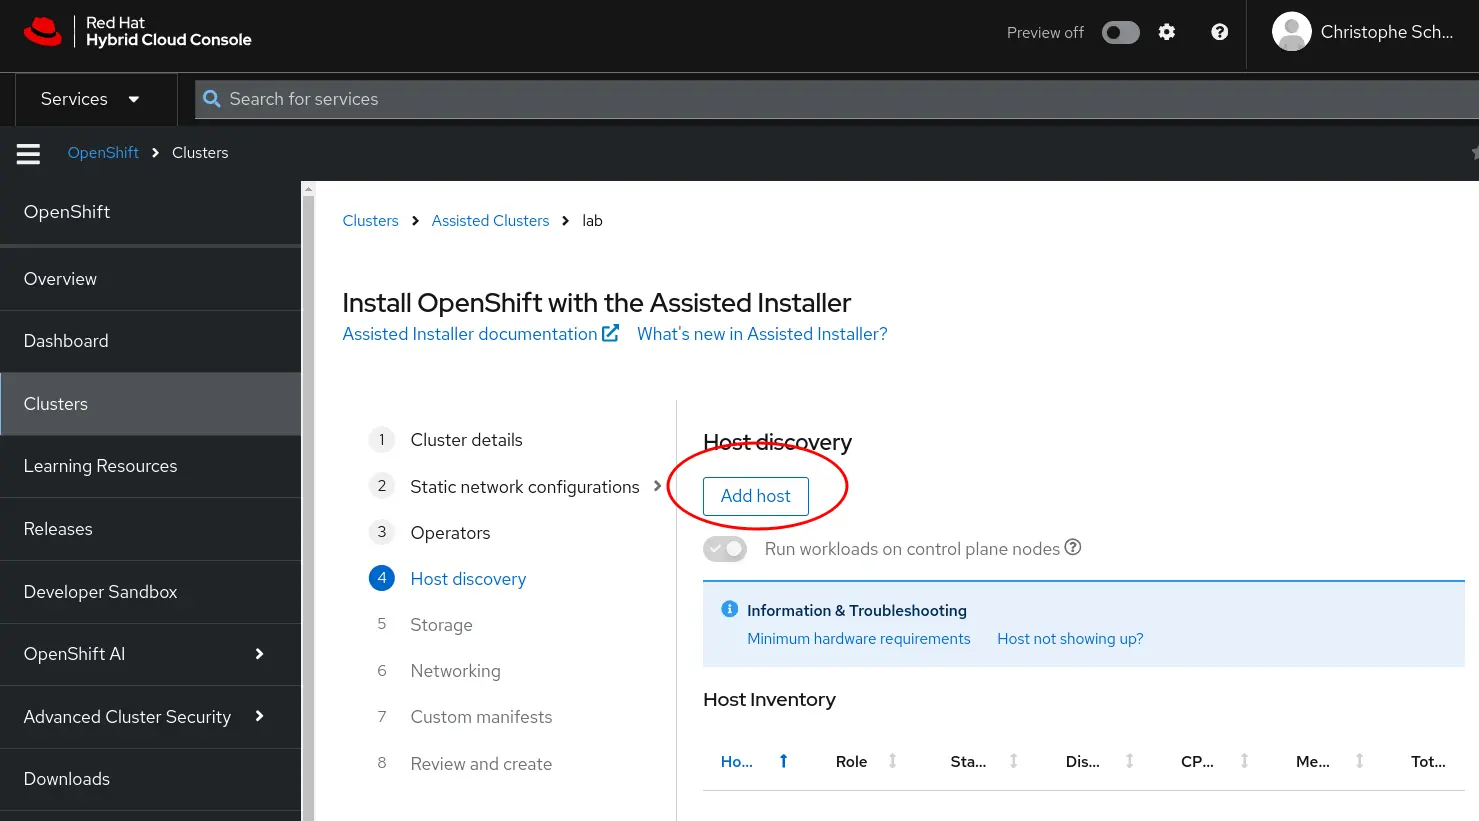
Host discovery
The Assisted Installer is now going to wait for nodes to register. To get a node up and running, all you have to do is generate the ISO, and boot your laptop with it. First, click on Addhost
When you generate the ISO, make sure to:
- Set the provisioning type to
Full Image type - Add your ssh public key, in case you ever need to ssh to that node. I like to use
xclip ~/.ssh/id_rsa.pubto get the content of my public key in the clipboard, making it easer to paste.
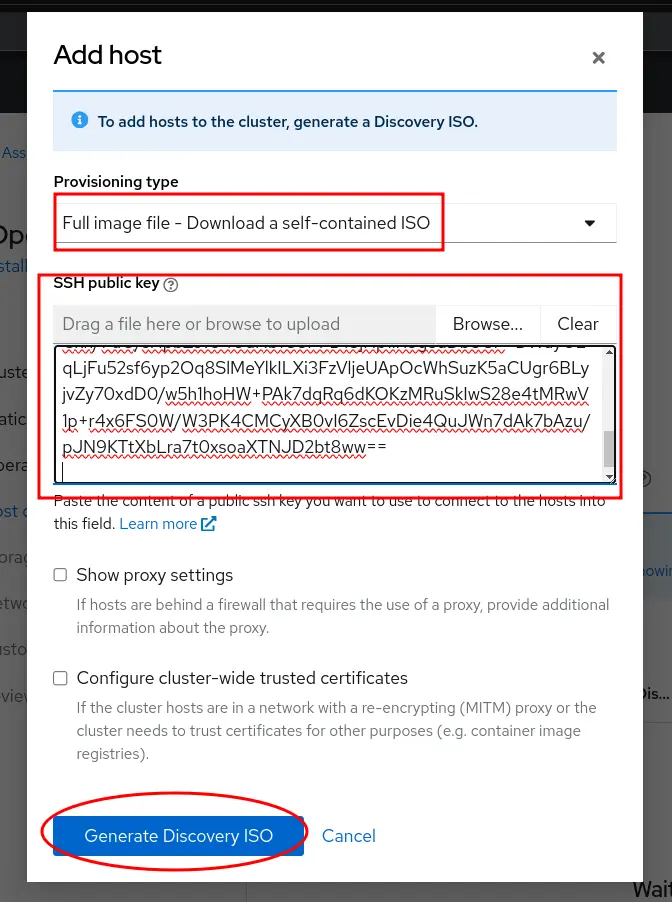
Then you can click on Generate Discovery ISO, and then Download Discovery ISO
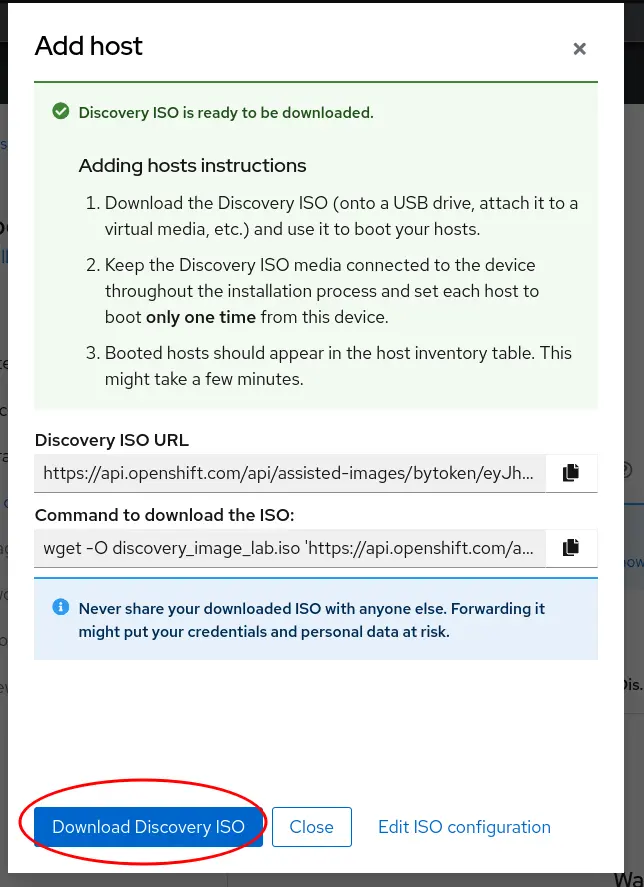
Now, if you have your PXE server ready, you will know what to do next. Otherwise, burning that ISO to a usb key and booting from that key will do the trick. I like to use Fedora Media Writer for that purpose.
After booting, your node should appear in Host Inventory section and you will be able to continue the installation process
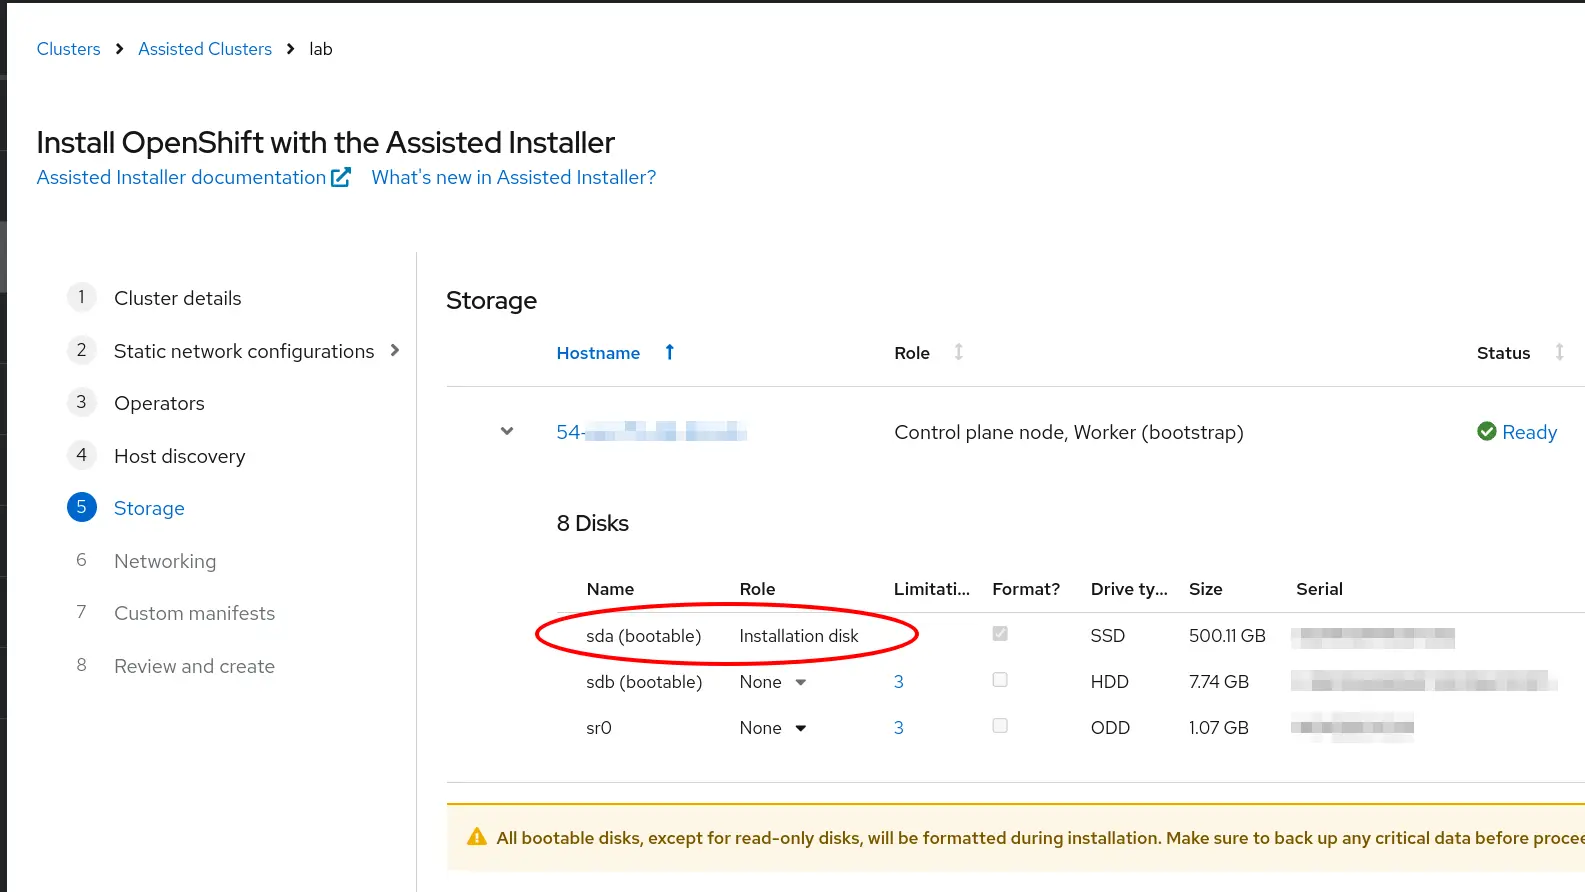
Storage
When you arrive at the storage section, you will see your main laptop disk. This might be sda or nvme0n1, depending on your disk. Just make a not of it, you will need that info for the next section
Custom manifests (that's where you will partition your disk)
That bit is important, and not yet well covered by the interweb. You typically only have one disk on your laptop, and the OpenShift installer will just consume that whole disk for the file system, leaving zero storage for your OpenShift workload (Persistent Volume / Persistent Volume Claime). This will be very limiting. There are ways to add more disk later:
- One example I tested, is just to plug a large (128G) USB stick, which is wiped first with the command
wipefs -a /dev/sdXwhere you need to pick the correct X value of course,sudo fdisk -lwill help identify it. After that, the LVMS operator will consume from that USB storage. I would use that if the laptop disk was too small. - Another example I tested is to create a large file (this command creates one ~500GB
dd if=/dev/zero of=/blockfile1 bs=50M count=10000) and setup a loop device it with something like/sbin/losetup /dev/loop1 /blockfile1. Again, the LVMS will be happy to consume that storage.
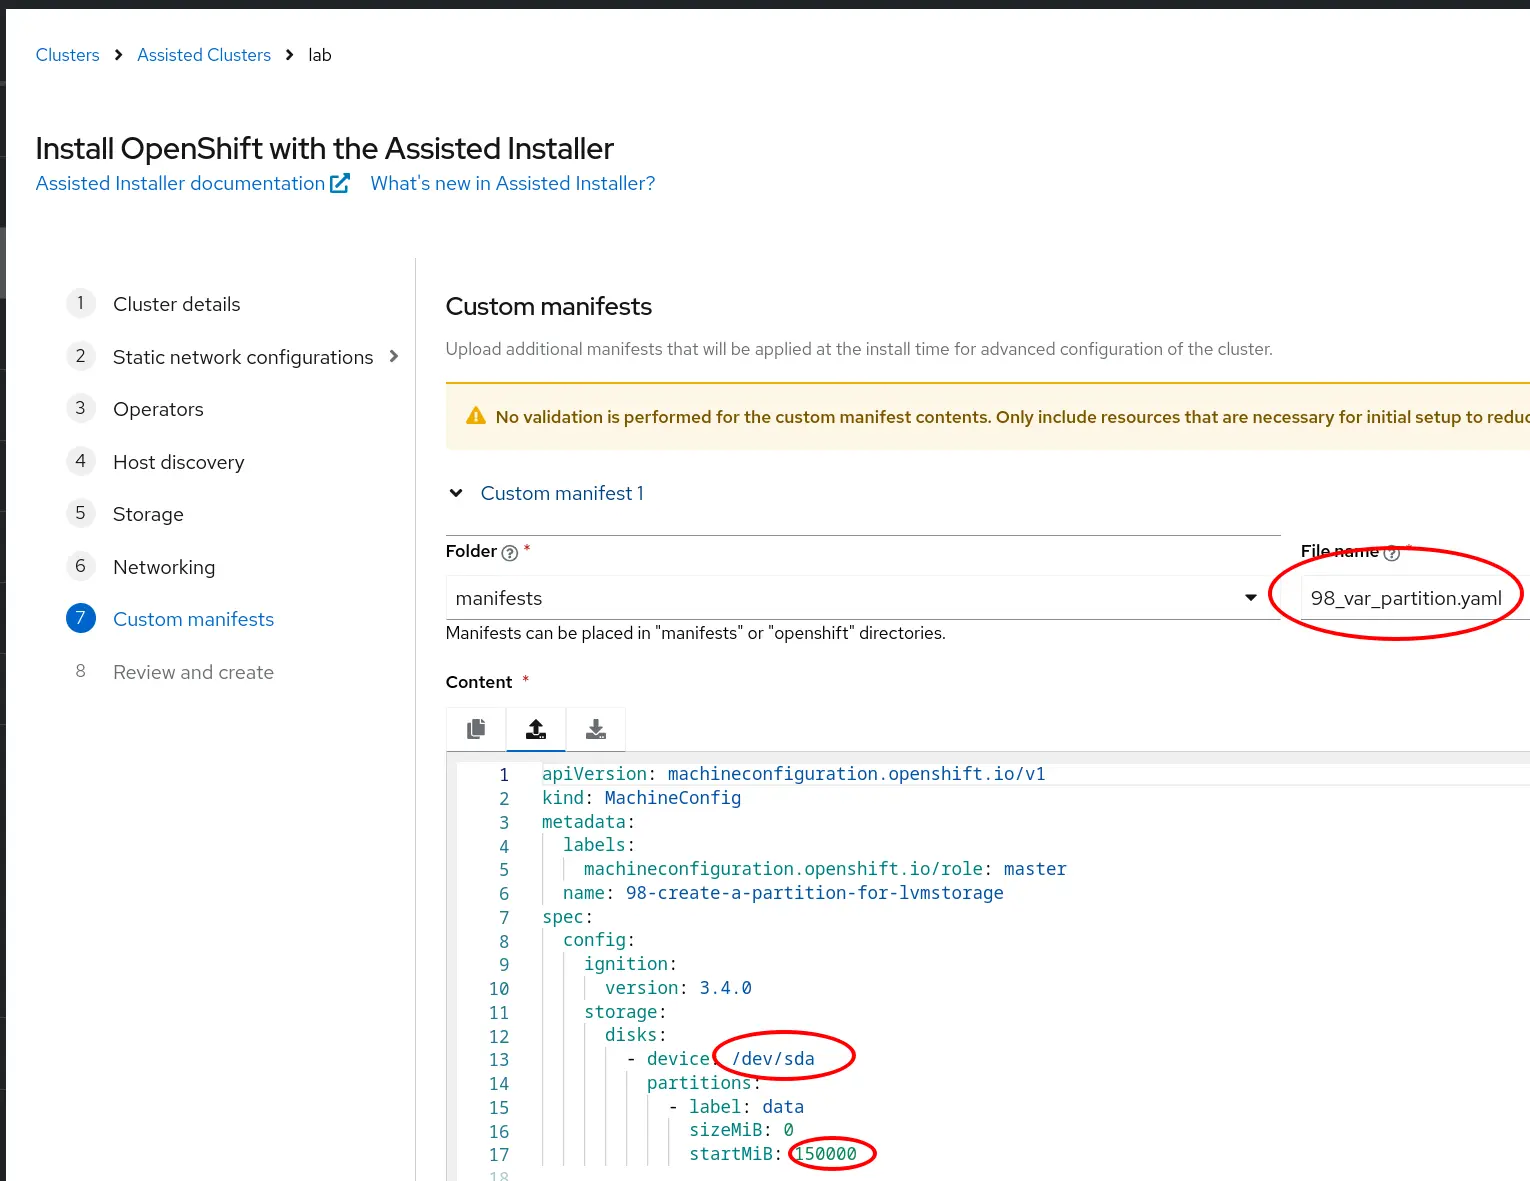
But the best approach is to get the disk partitioned via a MachineConfig Custome manifests at install time. Simply add the manifest below:
- make sure to use the correct device name, probalby one of
/dev/sdaor/dev/nvme0n1, this is visible in the storage section - name it something like 98_var_partition.yaml. The first two number (98) will make sure this doesn't get applied before more critical resource that should get deployed earlier.
- In this example, the second partition will consume all available space (sizeMiB=0) starting from 150000 MiB (So the first 150000 MiB partition will be the install partition). Simple. I think the minimum is 100GiB, recommendation is 200GiB. I cut the apple in half.
apiVersion: machineconfiguration.openshift.io/v1
kind: MachineConfig
metadata:
  labels:
    machineconfiguration.openshift.io/role: master
  name: 98-create-a-partition-for-lvmstorage
spec:
  config:
    ignition:
      version: 3.4.0
    storage:
      disks:
        - device: /dev/sda
          partitions:
            - label: data
              sizeMiB: 0
              startMiB: 150000
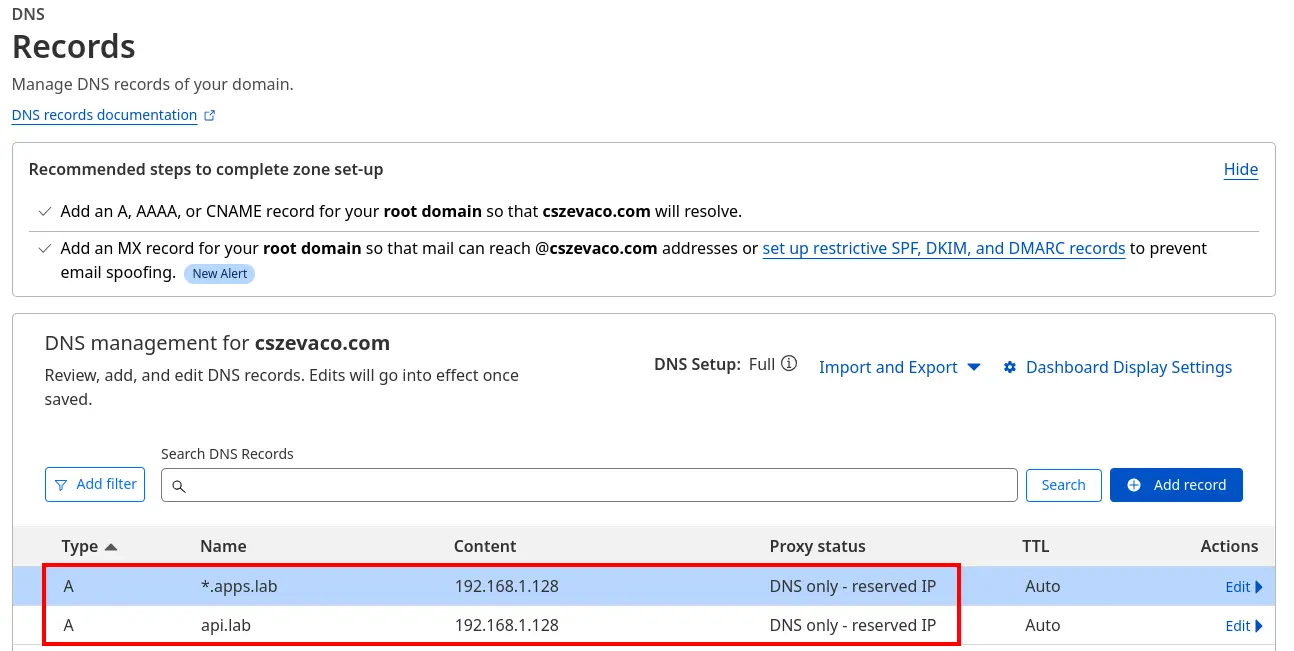
That should be it, you can now review and create your cluster. The whole process will take 30 to 60 min. I believe you will get an error until you somehow make sure to add the required DNS entry. I am using cloudflare for convenienve, you may also use your own DNS server in your lab setup. The two required entries are in my case:
api.lab.cszevaco.com      A	192.168.1.128
*.apps.lab.cszevaco.com   A	192.168.1.128
And on cloudflare, that looks like:
Post install configuration
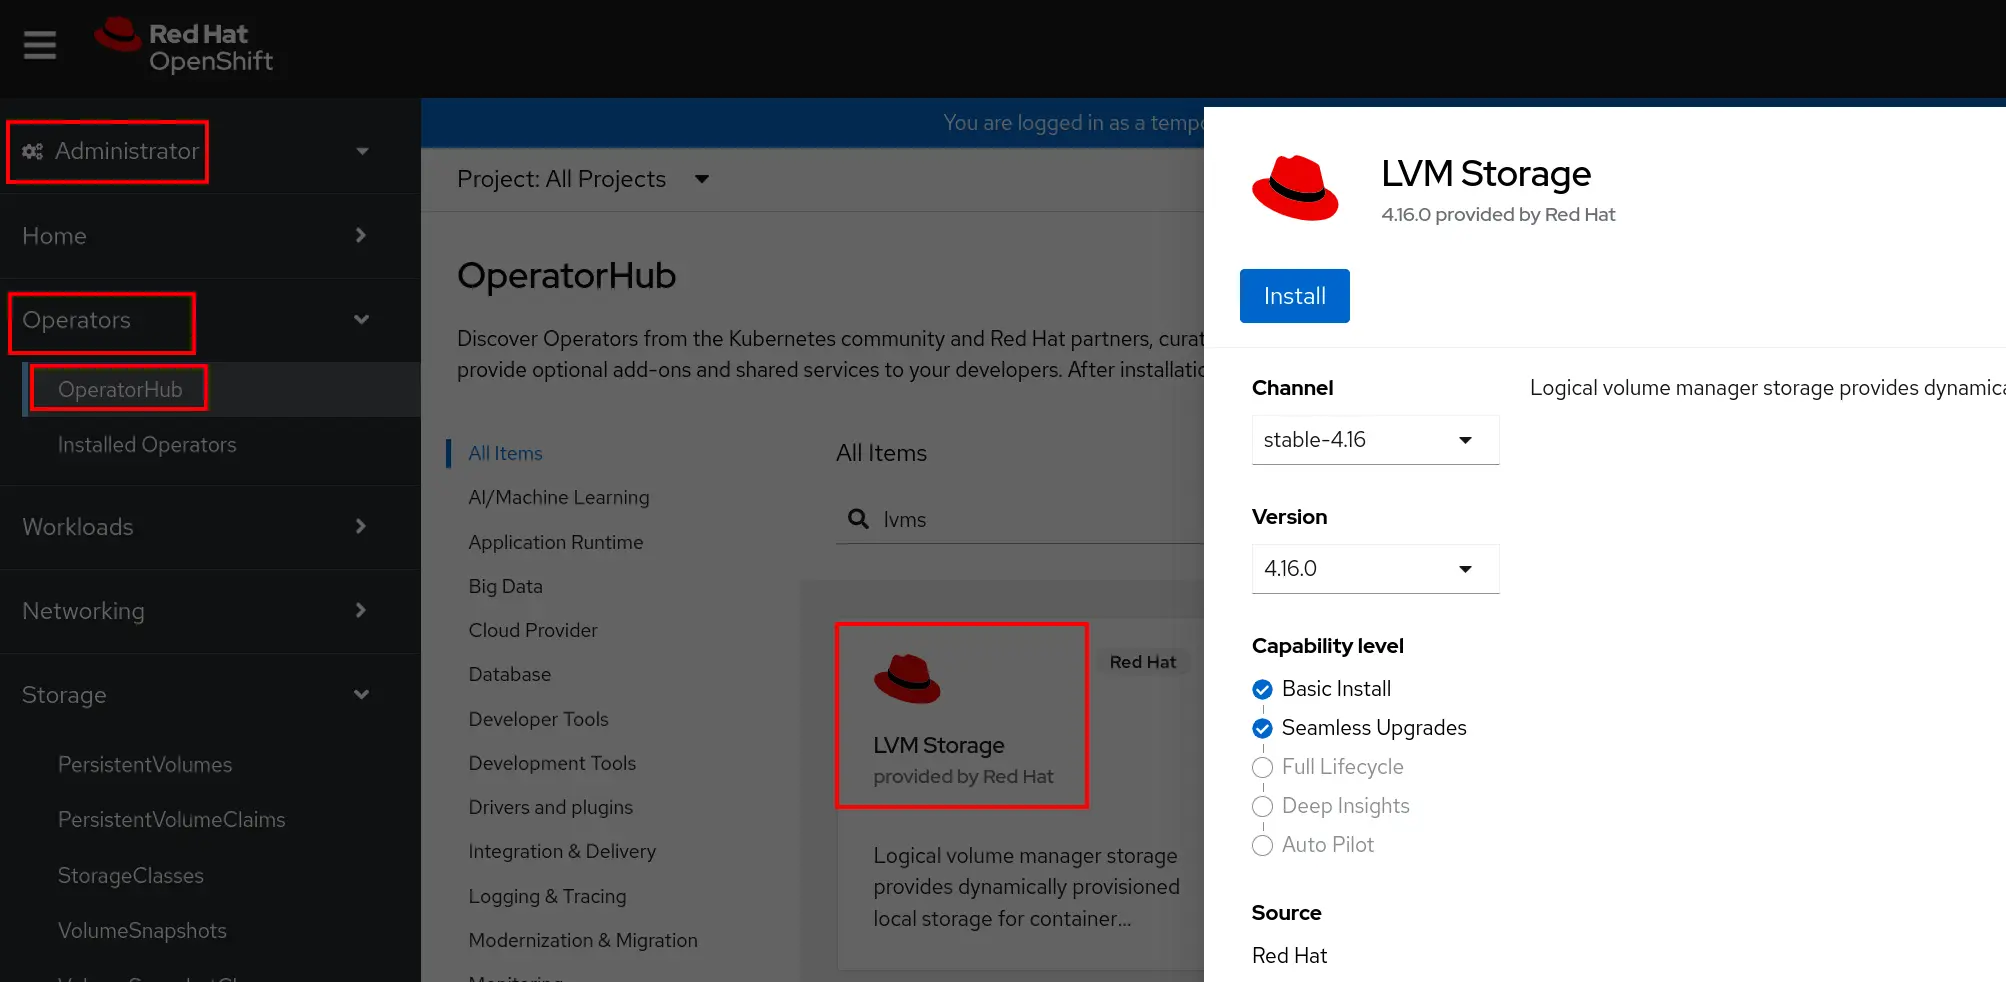
Install the LVMS Operator and LVMCluster
This should be straigthforward
For the LVMCluster, the default are fine
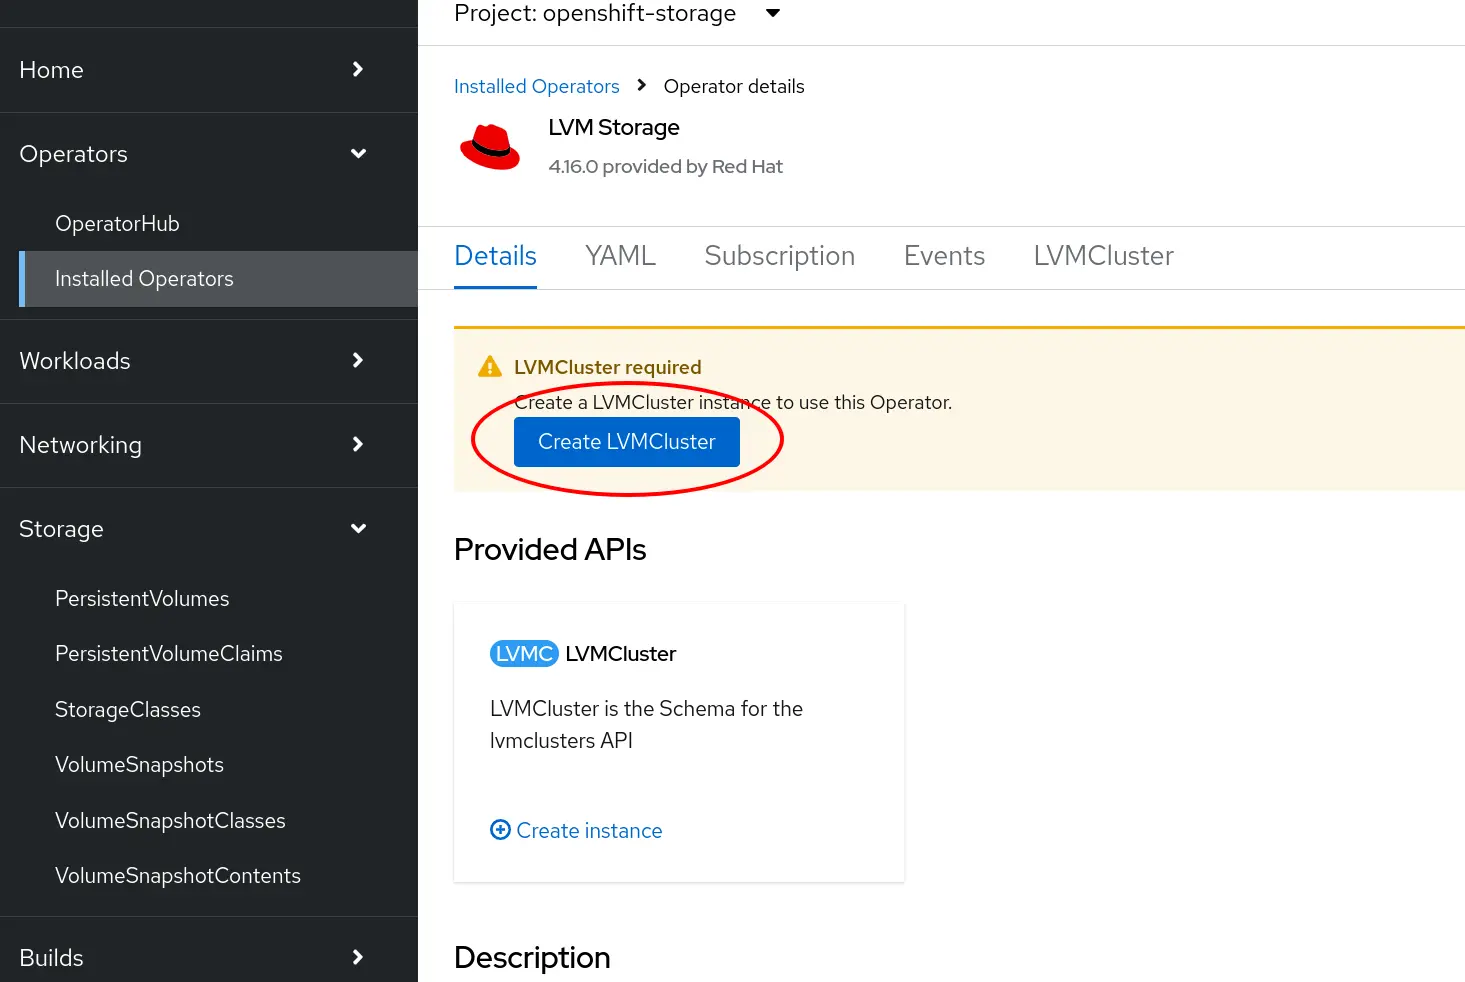
This will create a lvms-vg1 storage class for you. Happy days
Update the default storage class
You will need a default storage class for some workload to deploy correctly. You only have one storage class, make it the default one by adding this annotation:
storageclass.kubernetes.io/is-default-class: 'true'
Trust the CA certificate of your cluster.
To get ride of the insecure warning from the browser, or some cli command, you should trust the CA certificate of the cluster. On my linux distribution (Fedora), this single does the job (make sure to be log to your cluster first with the oc cli command)
oc get configmap/kube-root-ca.crt -n openshift-service-ca -o jsonpath='{.data.ca\.crt}' | sudo tee /etc/pki/ca-trust/source/anchors/$(uuidgen)-lab-ca.crt > /dev/null && sudo update-ca-trust
A browser restart may be required. On chrome, I bookmarked the handy chrome://restart url.
Of course, you can also configure your own certificate, but this post is getting lengthy. Another time.
Enable the image registry
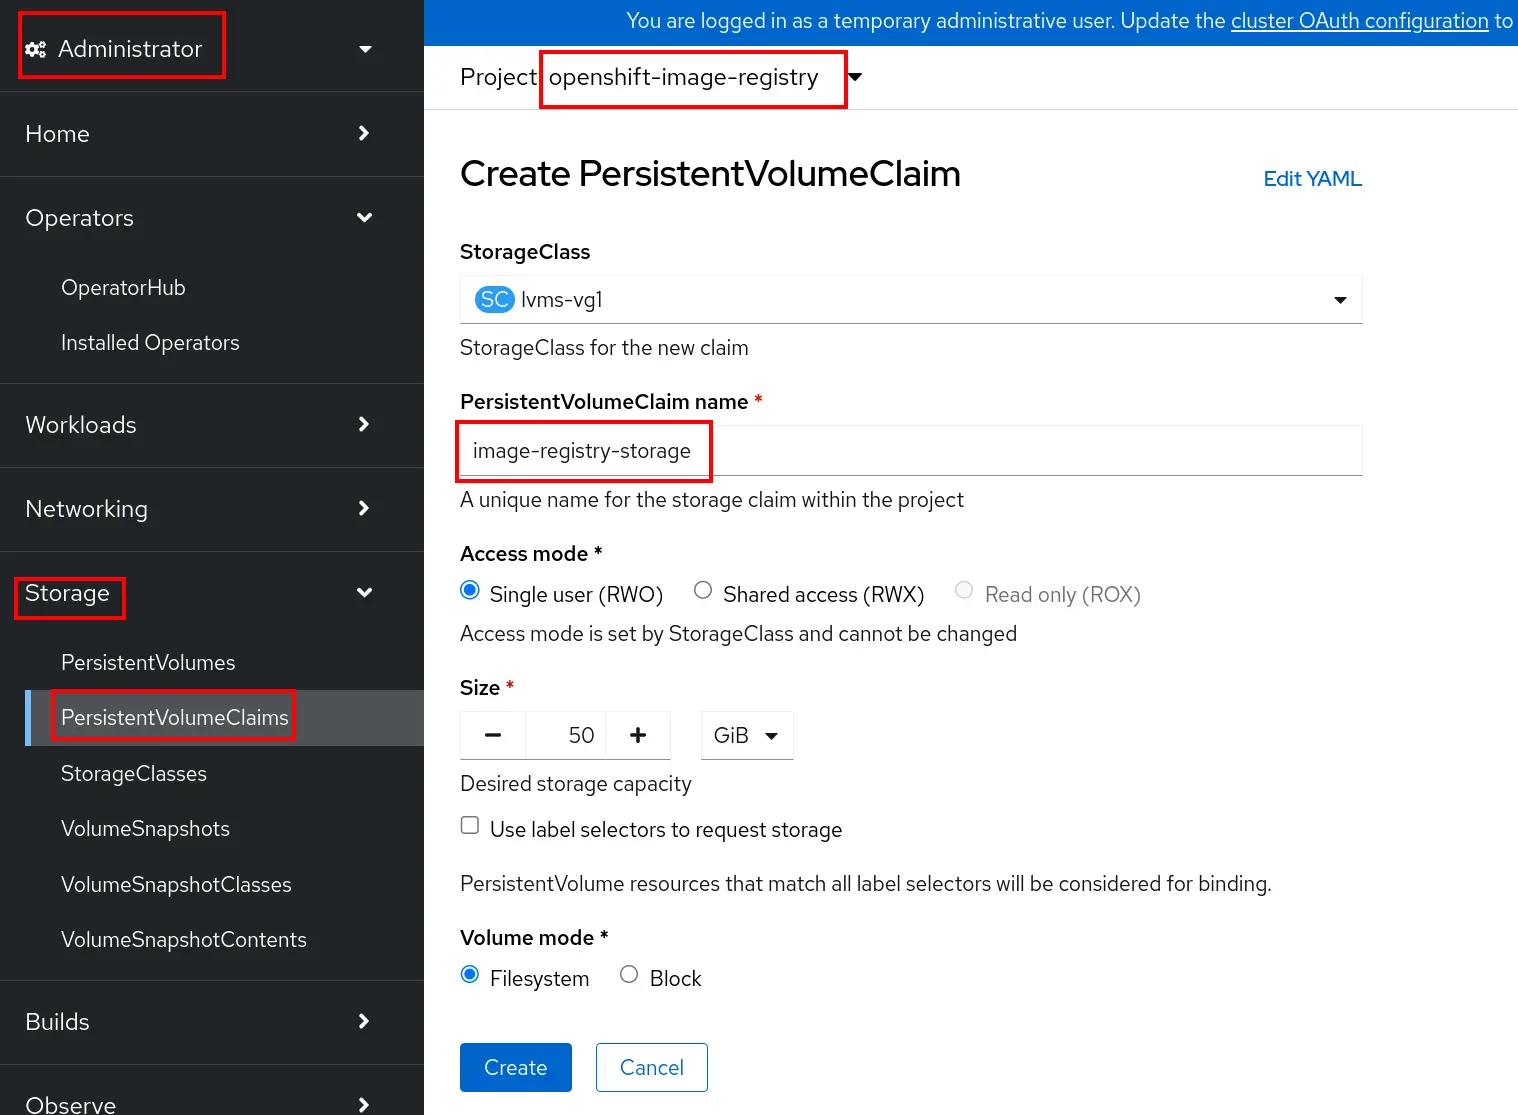
For this installation, the internal image registry is not automatically created. Pretty sure it's due to the lack of storage at install time. But now that we have a storage class, we can enable the registry. Follow that doco.
One caveat: the PVC for the image registry requests a RWX (Read Write Many), which our storage class can't provide. For SNO, only RWO (Read Write Once) makes sense anyway. So when following the instructions, you will see that the PVC is pending.

Just delete that PVC, and recreate it (with the exact same name, in the same namespace), using RWO. In addition, you may want to lower the size of that PVC (I use 50GB instead of the default 100GB). Adjust based on your use case, and storage capacity.
Troubleshooting
Node not showing up in the Host Inventery list after booting.
This may be a network issue, see if you can ssh into that node, and if that node can see the internet. Check the logs otherwise.
My SNO doesn't work anymore after I shut it down, and restarted later
This may be due to a certificate renewal issue. Ssh into your node, and run something like:
export KUBECONFIG=/etc/kubernetes/static-pod-resources/kube-apiserver-certs/secrets/node-kubeconfigs/lb-int.kubeconfig
oc get csr -o name | xargs oc adm certificate approve
This topic is well covered in other place of the interweb.